Wednesday, November 16, 2011

Photos: Some recent craftiness


Some recent creations, including two happy customers!

Tuesday, October 18, 2011

Circular patterns

Print out your own circular patterns, thanks to The Scientific Seamstress. For those times when you need to trace a circle, but a jam jar just won't do it! Good for all kinds of handicrafts, not just sewing. Circles included are from  1" to 58" in diameter.

Wednesday, September 28, 2011

Make Your Own T-Shirt Pattern

Found a great tutorial I just had to share - Mad Mim's 'Basic Fitted T-Shirt Pattern'. Make your own pattern with these great pattern drafting instructions.
Image Source: Mad Mim

Thursday, September 22, 2011

Standard measurements - useful tool for those who sew

If you sew/craft for children who may not be in your household, or may be napping as you sew...here's something great from Sugar Art Crafts. Follow the previous link to get a full size table of standard measurements for kids' sizes 3-6! A great resource that I will be using too.

Image: Sugar Arts Crafts

Tuesday, September 20, 2011

Garden Stone Tutorial

This is such a lovely idea...and a nice, personalised touch for your garden or courtyard.
Image: Sunset Gurl Design 

Sunday, September 18, 2011

Sneak Peek - Kids' Messenger Bags - Robots & Bright Blue Denim


Kids' Messenger Bag

Found this great tutorial over at Zaaberry. Can't wait to make some of these CUTE messenger bags for some of the little people in my life.


It didn't take me long to find some matching fabrics to use and prewash/shrink! As they're kids' bags, I anticipate they may need the occasional wash, so best to preshrink now, so the fabrics keep their shape once sewn.

Here, take another look at this cuteness:

Image: Zaaberry
Get the tute at Zaaberry!

Monday, September 12, 2011

Nautically Embellished Polos - A mini tutorial

At the moment, everything nautical seems to be en vogue. Stripes, rope and anchors are popping up everywhere. People really seem to be enjoying the trend - for example, for kids; The Girl Creative's Sailor Pants tute (as well as a guest Sailor Skirt post), Sew and The City's simple sailboat softie tute, Kalleen's Sail Away School Dress; and for adults, the Asymmetrical Maxi Dress by Sew Petite Girl, DIY Nautical Headband, Nautical Belt tute, Nautical Dress Tutorial and there's even nautical nail art video tutorials on YouTube!

Image: DIY Nautical Headband by Presser Foot

I saw some $6 kids' striped polo shirts at K-Mart, and decided that I could turn them into something a little more special - and nautical, of course, to fit in with the upcoming Southern Hemisphere summer. They were OK on their own, but pretty basic.


They were already striped, so that's a good start for the nautical look.

The thing about embellishing a shirt like this is that you can choose how far to take the embellishment. One of the easiest things you can do is simply change the buttons. I took the polo with me to the craft/fabric store and  matched the size of the buttons to some shiny anchor buttons. It is important to get the same size buttons as already on the shirt (or as similar as possible). Otherwise, they most likely will not fit through the buttonholes.

Snip or unpick the threads holding the buttons on, and remove. Set them aside if you like, for a future project!

Now sew on your new shiny buttons, in the same place as the old ones. Double your thread or use embroidery floss (like for cross stitch) for extra hold. Slip the new buttons through the buttonholes and check it out!


Below you can see a side by side comparison of an unchanged polo and one that has simply had the buttons changed. You could stop here if that's fancy enough for you.


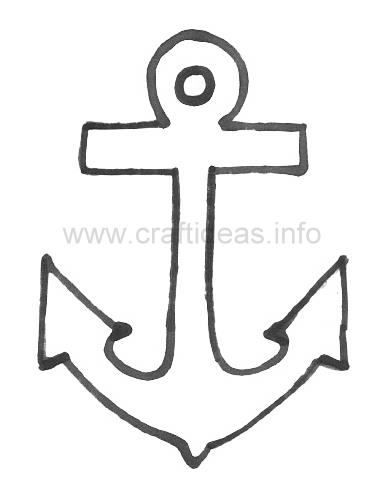
I wanted a design on the shirt as well, and settled on an oversized anchor. A quick google image search for 'anchor template' turned up this delightful number from Craft Ideas, which you can download here.

You can also use a store bought iron on patch if you prefer to skip this step. If so, iron on the patch and you're finished!

Print out your template and cut it out.

Iron a fabric square a little bigger than the size of the cut out template to some double sided iron on interfacing. You may know this as Wonder UnderVliesofix or Heat & Bond. Any of these is fine, just make sure it's the double sided stuff, to make this easierand quicker for you. You can use single sided iron on interfacing, but that will make your job a little harder.

At this step, I traced around the template onto my interfaced fabric, with my fabric pen that disappears when you wet it, and then cut out the shape. It's easier to cut after being interfaced, the cut will be straighter as the fabric is sturdier.


The pen is definitely a worthwhile investment! If you don't have one, any pen or chalk will do, or if you are worried about marking your design, just pin the template to the fabric and cut.

Now 
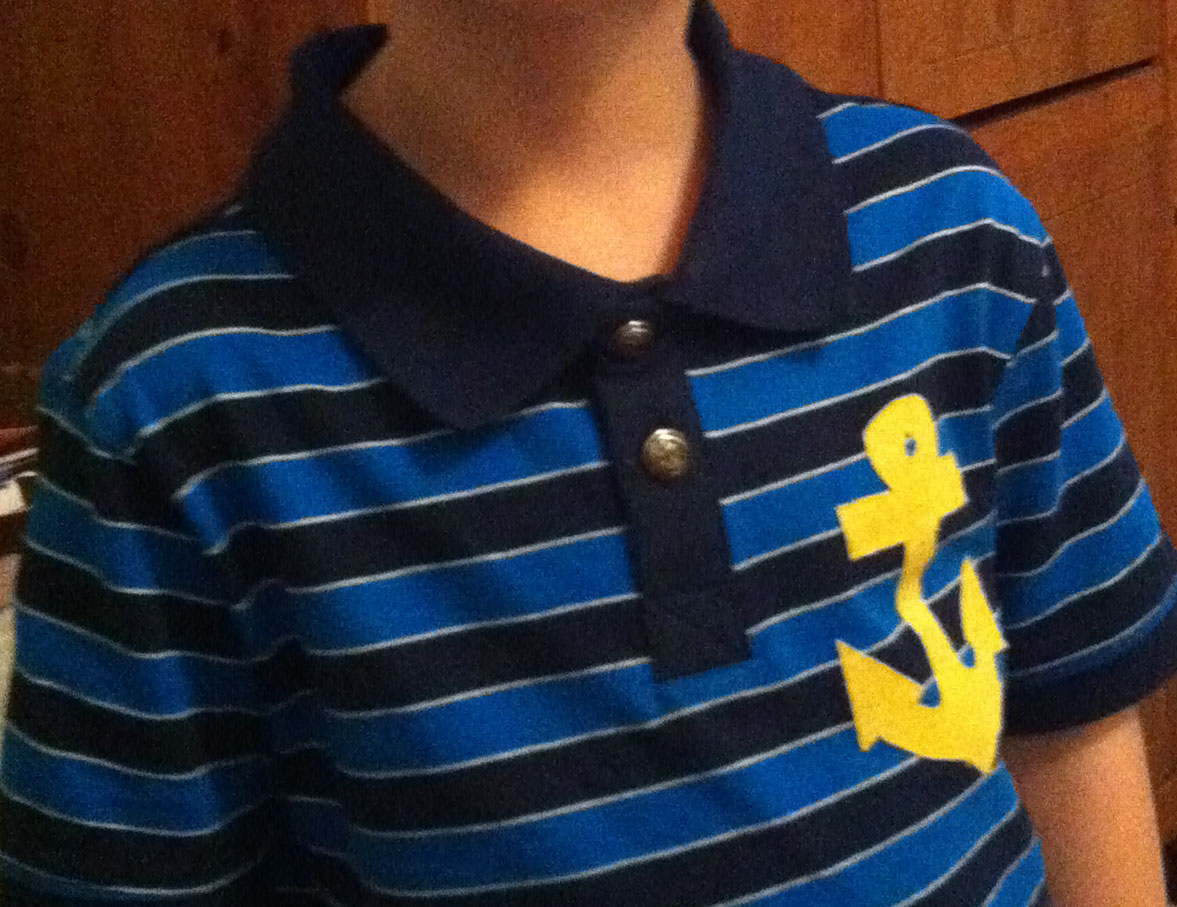
iron on your cut out anchor shape to your polo shirt, following manufacturer's instructions. If it didn't come with instructions, google 'double sided fusible interfacing tutorial'. There's heaps of them out there.

If you used single sided iron on interfacing, you'll now need to pin the shape to your shirt and sew around it at this point.

Your shirt should look a little like this. Note one polo has new buttons, one without, to show you what the polo would look like if you choose not to change the buttons.


If you don't like to sew, you can finish here, although sewing around the shape will make it last much longer through laundering and tumbledrying.

For the sewers, simply topstitch around the shape, don't worry too much about keeping a perfect shape. If the thread is the same colour, no one will even notice that corner is not perfect!

If you want to have a contrast here, you could use a different colour topstitching thread, or even a thicker thread. You could also handstitch around it with embroidery thread if that takes your fancy.

In any case, you're finished! Trim your threads and get someone to try on their new shirt.


Apologies for the iPhone pics! I really need to get batteries for my real camera soon!

Adding Pockets to Pants

If the idea of sewn in pockets (as opposed to patch pockets) scare you, this tutorial by Shwin & Shwin makes them seem a little easier.


I know I will be combining this tutorial with the tried and true Kid Pants pattern for my next pants project! I'll make sure to let you know how they turn out.

Sunday, August 21, 2011

New vest

Today I finished this little vest for my niece's birthday present, although this post will be delayed so it stays a surprise until after the party. The fabric was so lovely I couldn't resist, even though it was more than I'd usually pay for fabric for a child's garment. She's only little, so it didn't take much, and she's worth it!


It has a really lovely, bumpy texture, and hangs nicely. I combined it with pink denim to ensure it had a decent weight and hopefully washes well. Let's face it, toddler clothes are going to need washing!

I pre-washed and tumbledried my fabrics, as usual. I do this with all my apparel fabrics before sewing, or actually with anything I think might need washing in the future. This way, it's less likely to shrink by a large amount when washed after wear, and the seams stay nice. It drives me crazy waiting for the fabric to be ready for sewing, but it's worth it for the end result.

I know I hate it when I buy something at the shops, and then it shrinks weirdly in the wash and never sits the same way again.


I used a button on this one, without a snap, due to my new buttonholing skill! I love how it turned out. Originally, I had intended to use the patterned fabric on the inside of the vest, but it looked so cute, I couldn't bear to hide it ;)


I've made 2 of these previously, and I really recommend this pattern.

Happy Birthday, munchkin. Love you.


Wednesday, August 3, 2011

More Kid Pants by Made

I've been on a bit of a sewing blitz, getting some projects done that have been on my mind for a while. I just love Dana's Kid Pants pattern, and have been making quite a few. Still have a few to go, along with some requests from friends. They really are a great pattern, and there's a great tutorial to go along with it for beginners.I've enlarged it as the kids I was sewing for are bigger than the made pattern size.


Here's how some of my latest turned out.


Sunday, July 31, 2011

Buttonholes - TICK!

So excited - I have finally figured out how to do buttonholes on my sewing machine! It may sound like it's really easy, and to be honest, once you have the right foot and understand which switches to flick, etc, it really is! I decided today was the day, and I was going to figure it out.

Cue 20 minutes of me feeling a bit sweary and wasting bits of scrap material (also: this is how it has always gone before when trying to make a buttonhole). This was also how I felt about zips until I actually gave them a try. Now I love them!

All of a sudden, I realised there was one more setting I had to adjust. I had never noticed it before. D'oh! Adjusted - and my machine basically did it for me!

Behold, my first ever wonky buttonhole.


I'm very proud of it. It may not be perfect but now that I know I can do it, I can work on making them even better. Also, I tested it with a button. It worked!!!

I'm looking forward to doing more and more, as they have uses beyond just fastening buttons. It opens up some patterns to me that I had been avoiding because of the heavy button component...now I can give them a try!

Monday, June 6, 2011

Great Appliqué Tutorial

I love appliqué-ing different shapes and designs onto clothing, bags and zippered pouches...sometimes it just adds a little something. Here are some of mine:


If you are new to appliqué, you may want to check out the following tutorial (via What The Craft) as it takes you step by step and is really well explained.


There's heaps of different ways to appliqué...I personally love using Wonder Under (sometimes called Vliesofix in Australia), which is double sided iron on interfacing. In other words, you iron the shape on to the interfacing, and then you can iron it on to your project before top stitching around it. I find it adds stability and it's easier to place your appliqué.

Sunday, June 5, 2011

Kid Pants


Some Kid Pants made this weekend with some funky IKEA coordinating fabrics. I found the pattern was a little too skinny and short in the rise for the kid in question, so added co-ordinating strips of fabric down the sides and a separate waistband for more wiggle and wriggle room.

Thursday, June 2, 2011

Hula Hoop Rug

Gosh, I love this hula hoop rug tutorialby Nicole Blasenak Shapiro, as seen on Family Fun! What a fun thing do do with some old t-shirts or fabric scraps. 

Sunday, May 22, 2011

Appliquéd T-Shirts

Had some fun making tie appliqués for some kids' shirts over the weekend, what do you think?


If you want to give it a try yourself, head over to Crap I've Made's Appliqued Onesie tute. It really is quite simple and I've already had random compliments from strangers! They look great. Thanks, Char!

Tuesday, April 26, 2011

Sewing machine is still alive!

It's been a while since I have had the time to do any new sewing, but last night and today I leapt on the brief window of opportunity that I have to sew over the coming weeks.


It felt great to get some things done that have been on my mind for ages. Gifts, new items for sale (not yet in the shop) etc. The sewing itself is great for me though. It's not just sewing an item, the end result. It's the whole process for me, an excited meditation of sorts. I sort out problems, think of solutions and bliss out.


It's the process of sewing itself, and other forms of creating. Maybe you're not a sewer or a crafter, but I think many people have a hobby like this. Maybe for you it's reading, running or gardening. Maybe it's dancing, singing or cooking. The feeling is the same. Tell me, what's your hobby?

Sunday, March 27, 2011

Mini-eco's Printable Sewing Cards for Kids

mini-eco has posted a free printable to help those with curious children. If your kids love crafting with you, this would be a great way for them to stay occupied while you do your thing, learn a new skill and create something lovely. Check out these cuties - mini-eco's printable sewing cards, with a great tutorial to accompany them.

Saturday, March 26, 2011

Hooded Towel

Once there was a little kid who had a brother who had a hooded towel. The kid wanted one too.


So I fixed that problem! Now both little kids have hooded towels with removable, snap off hoods.

It was quite easy to do - I used 2 towels I found on sale for $4 each and a strip of cotton canvas my mother gave me from a past project for decoration. The fabric has dinosaurs on it so is just perfect.

One towel is the portion that covers the body, I cut part of the other one to make the hood. I saw a tutorial for this project online a while ago, but I didn't use one. Basically I just looked at the existing towel we had and        copied the design.

Sunday, March 20, 2011

Funky Belts

Check out this awesome belt tutorial from Elsie Marley. I made two of these tonight for kids aged 2 and 4 and they just adore them.


Always great to see things you make being appreciated by little ones, they are so honest and expressive you know they mean it when they tell you they love something!

I did make a variation which I believe makes them even better. I love her version - great, especially if you have an awesome fabric that you want to use. This time, I wanted to speed up the process though, and make them a little 'rockstar' as the 4 year old just loves his 'rockstar style'.

The simple change I made was using cotton webbing instead of sewing fabric and interfacing etc. I really love the end result! Better non phone pictures coming soon. Meanwhile, if you need a belt to keep your little guy or gal's pants up, give this tute a try!

Thursday, March 10, 2011

Fluid Dress

How cool is this 'Fluid Dress' from CasualProfanity.com???


Fluid Dress from Charlie Bucket on Vimeo.

Sunday, February 27, 2011

Win a Tempest Ahoy Dino Hat!

If you head over to Charlie Moo's, you can enter for the chance to win a Tempest Ahoy Dino Hat! Good luck!

Make sure you check out the rest of the site too, owner Joanne is just great and has lots of interesting things to say and sell!

Saturday, February 5, 2011

White Lotus Cooks

I can't quite remember how it happened, but somehow on Monday night, I discovered White Lotus Cooks.


Image: White Lotus Cooks

Please do yourself a favour and visit her site...wonderful recipes, gorgeous food pics and rich story telling behind each one.